Free Resources 👇 👇
CSS Snippet 👇 👇
					selector{
    backdrop-filter: blur(5px);
}
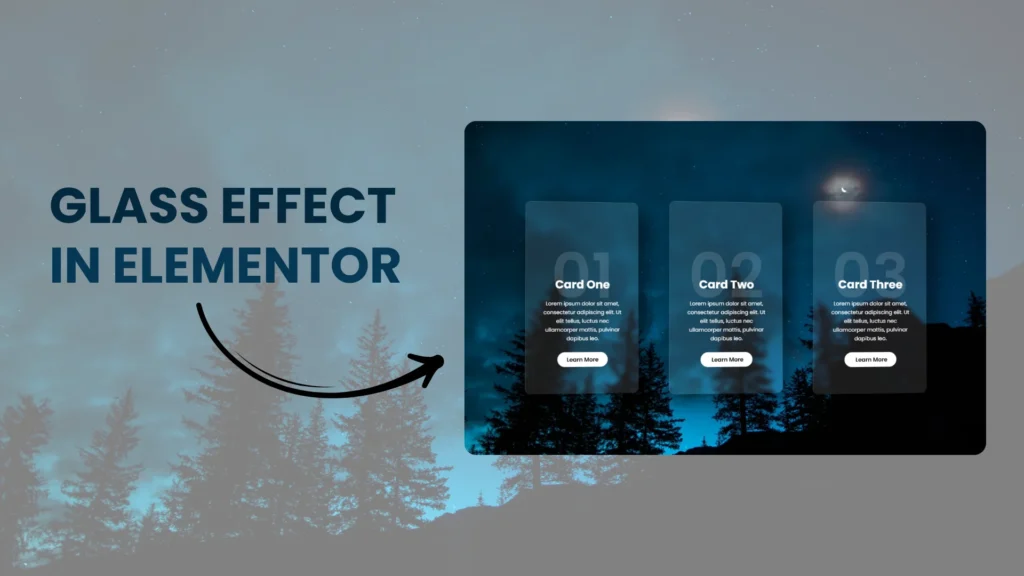
How to Create Glass Effect Using Elementor?
Step 1 – Click on create column > Click flexbox and create 3 columns with similar width > Make minimum height to 100VH > Add padding – Right 40px, Left 40px.
Step 2 – Click on to Style > Upload image > Position – Center, Attachment – Scroll, Display Size – Cover
Step 3 – Add Inner Column > Add padding – Top 70px, Right 40px, Bottom 70px, Left 40px.
Step 4 – Add 2 Heading > Add text editor > Add button
Step 5 – Click on to first heading > Add number increase the size > reduce the margin -125px button > Add heading text > Text editor text > Button text
Step 6 – Click on to inner section > Add color code – #FFFFFF1A > Border radius will 15px from all sides > Border width will be solid increase width 1px from top and 1px from left
Step 7 – Click on to box shadow > Horizontal 20px, Vertical 20px, Blur 50px, Spread 5px
Step 8 – Now the last few steps, Adding magic our CSS > You can copy CSS snippet from above and paste it under custom CSS section in inner section.
Step 9 – Go little up > Click on to Motion Effects > Enable mouse effects > Click on to 3D tilt > Speed will be 3.
Step 10 – Hurray! Your Glass effect card is ready! Now you can delete rest 2 columns and duplicate this column into 2 and change the text as per your website requirement.
Thank You!